The recent addition of support for 360-degree photos and videos on Facebook has sparked new interest in the technology from many people including myself. Although Google Plus has supported sharing of 360-degree photos for many years, it never got much traction. The addition of Facebook support as well as newer, simpler viewing plug ins will push this technology forward.
Additionally, there are new capture solutions that will make the process much simpler, although there is a cost to the quality.
My preferred method to capture 360-degree photos is to use my specialized nodal-point tripod attachment and my 16mm fisheye lens. This combination produces extremely large, high quality photos that also take a long time to create. You can see some examples of these photos in my other blog posts on the virtual tours.
However, many budgets do not have room for the amount of work that is required. Further, the requirement for such high quality photos is not always present. Sometimes the client just wants an efficient way to show people what the space looks like. In many cases, the viewing device will be a cell phone so ultra high resolution is not required.
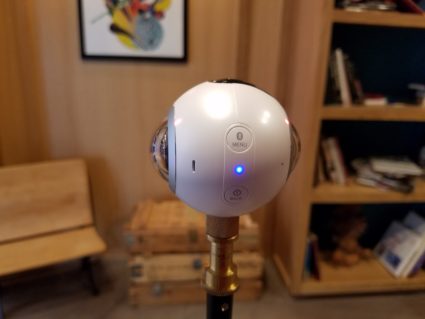
I’m currently testing the Samsung Gear 360 camera. This device allows me to quickly shoot two images that can be stitched together to form one fully immersive 360-degree photo.
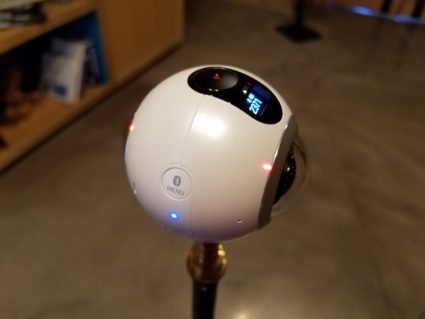
It has a few controls and a small display that can be used to navigate the menus, but the only way to see the photos is through a nearby Samsung cell phone.
The photos are pretty good considering how simple the process is.
During a recent shoot at El Paso’s Hotel Indigo I decided I would take a few test shots with the Gear 360. Here are the unedited results:
As expected, the little camera has a very hard time capturing the brightest brights without blowing the highlights. All these images were shot with the HDR mode enabled – which seems to tame the brights and darks without taking multiple photos.
It is important to make sure the camera is perfectly level to avoid tilted final images. While I’m sure this issue can be corrected later, the goal of shooting with this device is to reduce the amount of post processing adjustments to as few as possible.
Care will need to be taken to orient the camera so that both sides can see the full range of light to calculate the exposure while also considering where the stitch line will fall.
As mentioned above, these photos are straight out of the camera. With a little adjustment in photoshop they will show a significant improvement.